How to Design Your Own Fabric?

Designing fabric starts with a feeling, but it succeeds through careful decisions. You may picture deep green linen with a soft, dry touch. That image needs a fiber, weave, weight, and finish. To design your fabric, translate emotion into measurable details. Record its intended use, washing method, width, and target price. A beautiful idea can fail when it shrinks, pills, or feels uncomfortable against skin.

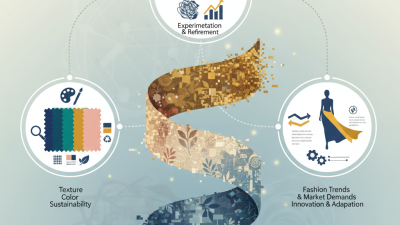
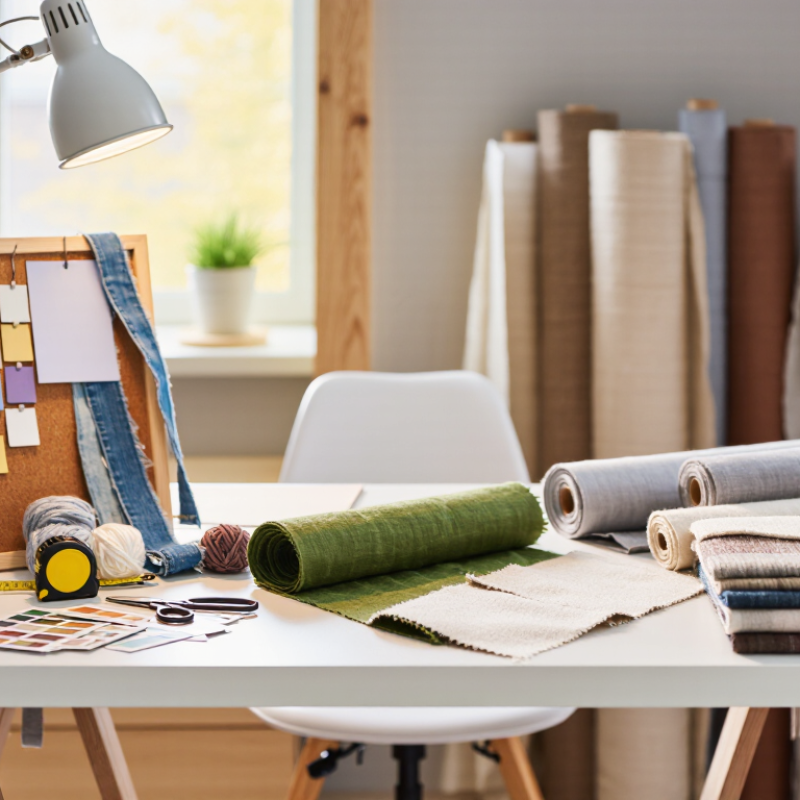
Begin with a small mood board. Add paint chips, clothing samples, dried leaves, or photographs of worn surfaces. Then compare cotton, linen, wool, recycled fibers, and blends. Each material responds differently to heat, moisture, tension, and dye. Textile professionals often test small swatches before approving production. You should do the same. Examine color under daylight, indoor lighting, and gentle movement. Check the fabric after washing, drying, and repeated rubbing. Reliable results come from written measurements, not memory.

Expect mistakes.

Your first sample may feel too stiff. The pattern may blur, or the colors may look dull after washing. These problems are useful evidence, not final judgments. Adjust one element at a time, such as yarn size, thread density, or dye concentration. Ask an experienced technician or responsible supplier to review the results. Confirm fiber claims and care instructions through dependable documentation. A successful fabric balances appearance, performance, comfort, and responsible production. Even then, perfection is unlikely. The strongest design often develops through patient testing, honest reflection, and a willingness to change the original idea.
How to Design Your Own Fabric?

Define Fabric Goals with Fiber Content, GSM, and ISO Performance Targets

How to Design Your Own Fabric?

Define Fabric Goals with Fiber Content, GSM, and ISO Performance Targets

Designing fabric starts with its intended use, not its appearance. A summer shirt may need breathable fibers, a soft hand, and a light GSM around 90–130. A work jacket may require stronger yarns and a heavier GSM above 220. Fiber content shapes comfort, drying speed, strength, and shrinkage. A small percentage change can alter the fabric noticeably.

Tips: Write three measurable goals before sampling. Record the fiber blend, yarn count, weave, GSM, and finishing process. Keep one unwashed sample for comparison. Do not trust touch alone.

Set performance targets using relevant ISO test methods. For example, define limits for dimensional change after washing, colorfastness, abrasion resistance, tensile strength, and pilling. The exact target depends on the garment’s use and market requirements. A fabric for children’s sleepwear needs different evidence than upholstery fabric. Ask a qualified laboratory to confirm the selected method and testing conditions.

I have found that early samples often feel better than the final production fabric. Finishing can change softness, width, and weight. That is easy to underestimate. Test at least three production-like samples, not only a carefully prepared prototype. Review failures honestly. If the fabric pills after repeated rubbing, changing the fiber blend may work better than adding more finish. A clear specification makes revisions faster and reduces costly guesswork.

Choose Fibers and Blends by Strength, Moisture, Cost, and Recycled Content

How to Design Your Own Fabric?

Choose Fibers and Blends by Strength, Moisture, Cost, and Recycled Content

Begin with the fabric’s job. A work shirt needs abrasion resistance, while a summer scarf needs softness and airflow. I usually compare fiber samples after washing, stretching, and rubbing them against rough cotton. Test it wet. Some materials lose strength when soaked, even if they feel durable when dry.

Moisture behavior also changes comfort. Fibers that absorb water can reduce clamminess, but they may dry slowly. Low-absorption fibers dry faster and often resist wrinkles. A blend can balance these traits. For example, combining a strong fiber with a softer one may improve wearability, but it can complicate recycling later. That trade-off deserves honest attention.

Cost depends on more than the fiber price. Spinning, dyeing, finishing, and minimum order sizes can reshape the budget. Recycled content may reduce waste, yet recycled fibers can show shorter staple lengths or uneven color. Request documented recycled-content information and practical test results from suppliers.

Then check tensile strength, shrinkage, colorfastness, and moisture regain under consistent conditions. Small tests reveal useful problems. My early samples sometimes looked excellent but failed after repeated washing. That mistake taught me to judge performance over time, not from appearance alone.

Set Yarn Count, Weave or Knit Structure, and a 120–300 g/m² GSM Range

How to Design Your Own Fabric?

Designing fabric starts with a clear target, not a beautiful sketch. I usually set the yarn count before choosing the construction. Finer yarns create lighter, smoother surfaces. Coarser yarns add texture, warmth, and visual weight. For woven fabric, count can be expressed as Ne or tex. Always confirm the measurement system with your mill. Confusion here can distort the entire sample.

Next, select a weave or knit structure that supports the intended use. Plain weave gives stability and a clean appearance. Twill offers better drape and a visible diagonal texture. Jersey knit stretches comfortably, while rib knit provides stronger recovery. The structure changes both hand feel and GSM. A 120–160 g/m² fabric suits lightweight shirts and linings. Around 180–240 g/m² feels more balanced for daily garments. Fabrics from 250–300 g/m² provide warmth and stronger body.

Measure carefully. Then test the fabric after washing. My first sample often feels correct before laundering, but changes afterward. Shrinkage, spirality, and surface fuzz can reveal weaknesses. I once chose a soft yarn that produced attractive fabric, yet the finished cloth lacked shape. That mistake taught me to judge softness beside stability. Record yarn count, stitch or pick density, finished width, and actual GSM. Leave room for adjustment. Real fabric rarely matches the first calculation exactly.

Prototype and Test Abrasion, Shrinkage, and Colorfastness to ISO Standards

How to Design Your Own Fabric?

Designing a fabric begins with performance, not appearance alone. I usually create small prototypes and record fiber content, weave structure, yarn size, and finishing treatments. A soft sample may feel promising, yet repeated rubbing can expose weak areas quickly.

Abrasion Testing Abrasion testing under ISO 12947 helps measure resistance against controlled rubbing. I inspect the surface after each stage and note fuzzing, broken yarns, and visible wear. The result is not only a number. It shows where the fabric may fail on a chair, sleeve, or bag. My first samples often wear unevenly. That is useful evidence, even when it is disappointing.

Shrinkage & Colorfastness Shrinkage testing should follow suitable ISO procedures, such as ISO 5077, after washing or conditioning the specimen. I measure length and width before and after treatment, using the same reference points. Colorfastness tests from the ISO 105 series can examine washing, rubbing, perspiration, and light exposure.

White cloth can reveal dye transfer clearly. Small details matter. Test conditions must be documented, including temperature, moisture, pressure, and drying method. I once compared samples using different conditioning times, which weakened the comparison. A qualified laboratory can improve reliability, but clear records still matter. Prototype, test, adjust, and test again.

Prepare Production Specs with Width, Tolerances, MOQ, and Quality Controls

How to Design Your Own Fabric?

A fabric design becomes manufacturable only when its production specifications are measurable.

Define finished width, usable width, weight, fiber content, construction, and finish. For example, specify 150 cm finished width, 180 GSM, and a tolerance of ±2% for width. Set GSM tolerance at ±5%, unless the end use requires tighter control. These numbers should reflect testing, not optimism.

Textile Exchange’s 2024 Materials Market Report states that global fiber production reached 124 million tonnes in 2023. It may rise to 160 million tonnes by 2030. This scale makes material traceability and consistent specifications increasingly important.

State the fiber source, recycled content target, dyeing method, and approved test standards. Use ISO 3759 for dimensional changes, ISO 105-C06 for colorfastness, and ASTM D3774 for fabric width. Ask for laboratory reports, not verbal assurances.

MOQ needs equal clarity. Set it by fabric quality, color, and finish. A practical starting point might be 300 meters per color, but mills may require more for special yarns or treatments. Confirm sample yardage separately.

Inspect greige fabric, dyed rolls, shade continuity, defects, skew, and shrinkage. A four-point inspection system can support consistent grading.

My early specifications were too broad; “soft hand feel” created arguments. Add measurable language.

One mistake remains common: approving a swatch before washing it. Test the fabric after realistic care. Production can expose weaknesses that sampling hides.